
Disclosure: This page may contain affiliate links. If you purchase a product from one of our links, we could receive a commission from the seller, however, these do not influence our editorial choices. We aim to recommend products we believe in and to not mislead our audience. Learn More »
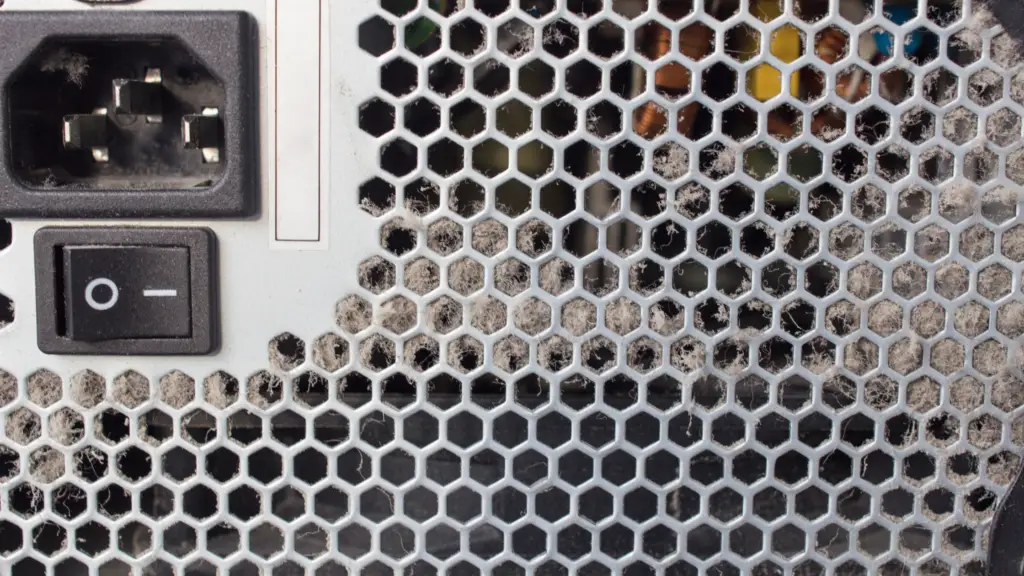
Modern PCs are pretty great at keeping dust out from the internal components thanks to dust filters over the fan intakes, more sealed designs than in the past, and better design in general. But even with these improvements, our desktops (and laptops too) can get fairly dusty after a period of time and can hamper general performance at a certain point.
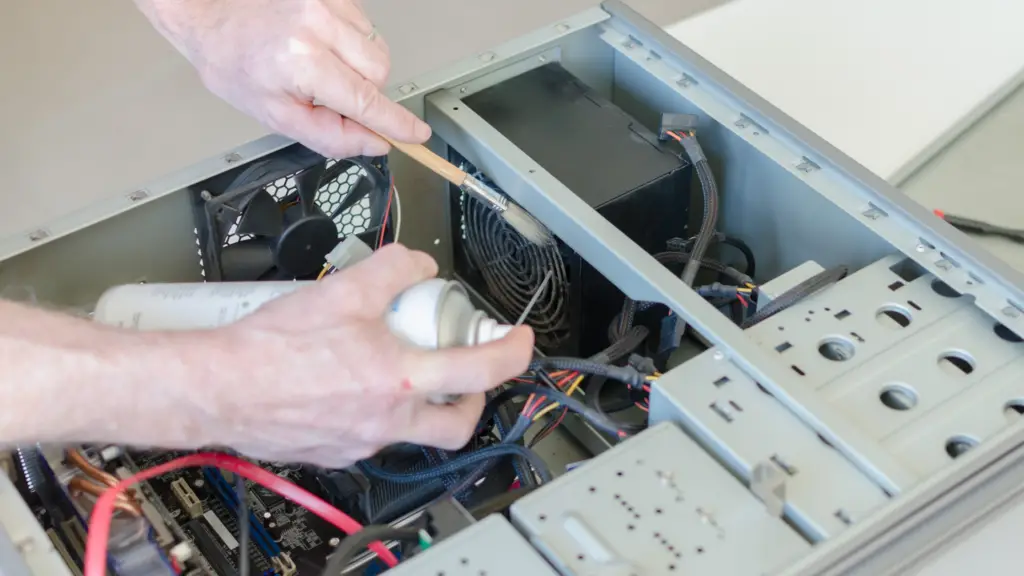
This can be resolved by cleaning out the insides of your case and the popular go-to here is compressed air (or canned air). While this is an easy quick way to get some dust knocked loose, it can be expensive, and environmentally harmful at a high level, and you may just not always have it lying around.
Thankfully, there are some great alternatives to using compressed air, and that’s what we’ll be looking at today.
The best methods for cleaning dust from a PC without compressed air
Use an electric duster instead of a can of compressed air
Okay, so, technically this is kind of a cheating answer, but hear us out. Our favorite method of cleaning dust from PCs (the easy way) is actually an electric duster. While it’s not traditional compressed air, it never runs out and is extremely powerful. Over the course of ownership, it’s much cheaper and more efficient than compressed air canisters.

Last update on 2024-03-29 / Affiliate links / Images from Amazon Product Advertising API
The MetroVac Electric Duster is our current favorite method of cleaning out PC towers, laptop chassis, dusty keyboards, desks, and more. It may seem a bit expensive, but there’s absolutely nothing cheaper that comes even close to the power and efficiency of this duster.
Why an electric duster instead of canned compressed air? The duster is much more powerful and never runs out–as long as you have power, of course. Compressed air can be fairly strong at first, but will lose intensity as the can loses pressure. The electric duster always is at the same pressure from start to finish.
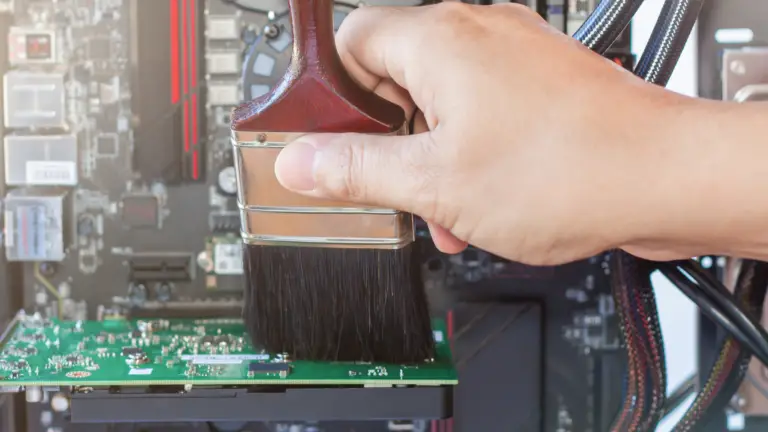
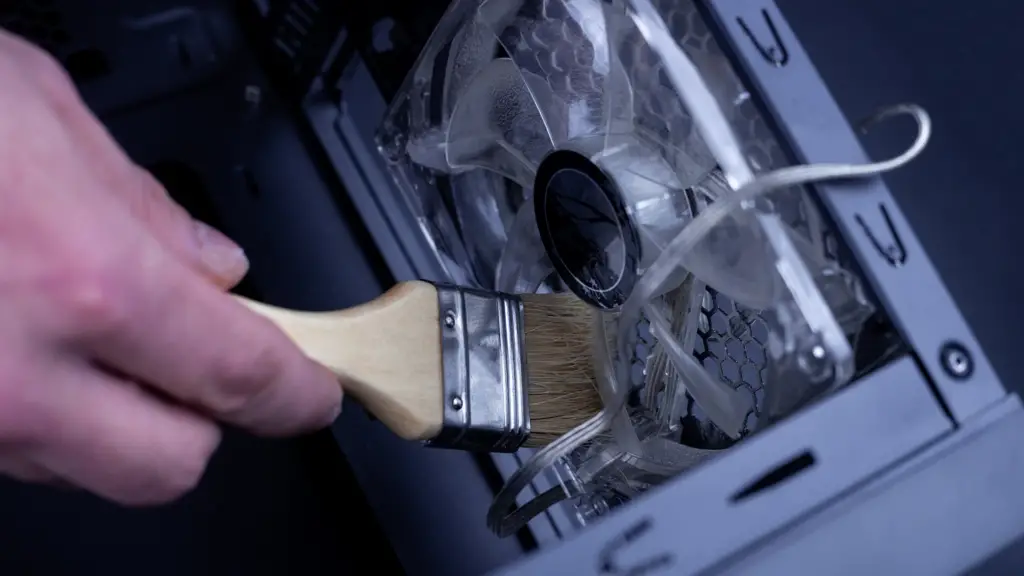
Clean components by hand with brushes, paper towels, microfiber cloths, cotton swabs, and elbow grease
If you don’t have an electric duster–which is probably the whole reason you’re reading this article in the first place–then you’ll most likely need to do everything by hand.
This means that you’ll be meticulously wiping down each component of your PC, and it will take considerably more time than with an electric duster, or even a can of compressed air.
But if your PC is malfunctioning and you need it resolved immediately, it’s absolutely better than letting it continue to overheat.
If you have something like a camera sensor cleaner or some other bulb/nozzle thing that you can squeeze for a bit of airflow, you can definitely use that to help. But a good set of brushes will get you a lot of the way there.
Last update on 2024-03-29 / Affiliate links / Images from Amazon Product Advertising API
We bought this set of brushes initially for cleaning our mechanical keyboards and laptop keyboards but they also work excellently for cleaning out PC components when we don’t have our electric duster handy.
What you’ll need to best clean dust from your PC
There are a few tools that are helpful to clean dust from your PC. You can get away with just the bare minimum, but some will definitely help in certain instances.
- Electric duster (optional, highly suggested)
- Paper towels
- Computer/electronics brushes (or a clean paintbrush)
- Cotton swabs
- Safety eyewear (probably a good idea)
Step 1: Power off the computer and take it outside (if possible)
Once you shut down your machine, unplug and disconnect it to bring it outside if at all possible. Depending on how long it’s been since the last cleaning, this could get really messy–especially if using a high-powered electric duster.
If outside isn’t an option due to weather, then your garage would also do. No garage? Well, maybe your bathroom as it’s probably a bit easier to clean. But it’s a smaller room and you may find this problematic.
If you’re removing fans and radiators as per the steps below you may want to do that inside, and only take the parts you’re planning on dusting off outside. There are some very small screws that you won’t want to lose.
Step 2: Take the case panels off
You’ll want to remove the panels of your case. This will most obviously be the side panels, but depending on your case design, may also be your front and top panels.
Side panels let you get to the inside components and back of the motherboard tray. The front panel will usually reveal the front intake fans, and the top panel hides either an empty top area or the water-cooling radiator and fans.
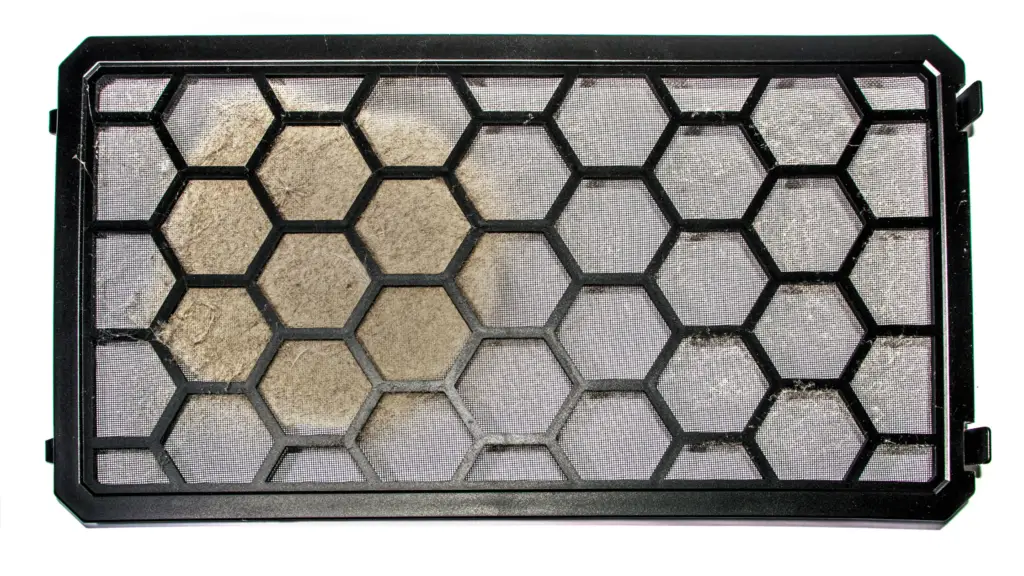
Step 3: Remove dust filters to clean them
Most modern PC cases have removable dust filters to try and keep the insides as clean as possible. Cleaning these filters should be done regularly, which is easily done by wiping them down with a clean paper towel or cloth. You can also use the electric duster if you have one.
Not all cases have the same filters, but there are a few main locations you’ll want to check:
Front panel filter
The first place to check is for a dust filter behind the front panel, especially if it’s a mesh front panel. You may need to remove the front panel first to access it, or it may slide out from the bottom of the panel.
Top panel filter
Some chassis have a top filter, and often this is a magnetically attached filter on the outside of the panel. This is the least common of the usual filter locations.
Power supply/bottom filter
Most cases put the power supply on the bottom of the case with the fan pulling fresh air in from the bottom of the case. There will often be a removable filter on the bottom side of the case covering the ventilation holes where the power supply pulls in its air.
These filters usually slide in and out–sometimes from the front, and others from the back. More modern designs are usually a full-length filter that slides out from the front, but some older designs still have a half-length filter that requires moving the PC away from the wall to remove it from the rear.
Step 4: If you have an electric duster, use it now
If you’re fortunate enough to have an electric duster at your disposal, we would recommend using it now. This will be the fastest way of getting the bulk of the dust removal done, and it might be most of what you need to do at all.
It’s pretty safe to blast out pretty much any part of your PC case with an electric duster, so go at it as much as you like. Be sure to get into the cracks and crevices, fans, power supply, CPU coolers, radiators, everything.
Whatever the duster doesn’t get you can physically wipe down later if you need to, but this will get you most of the way there.
As a warning, we’d advise wearing a filtration mask and eye protection if possible when using an electric duster and would say this is mandatory if you’re doing this in a small indoor room. These dusters are pretty powerful and you won’t want to get any of this in your eyes or mouth.
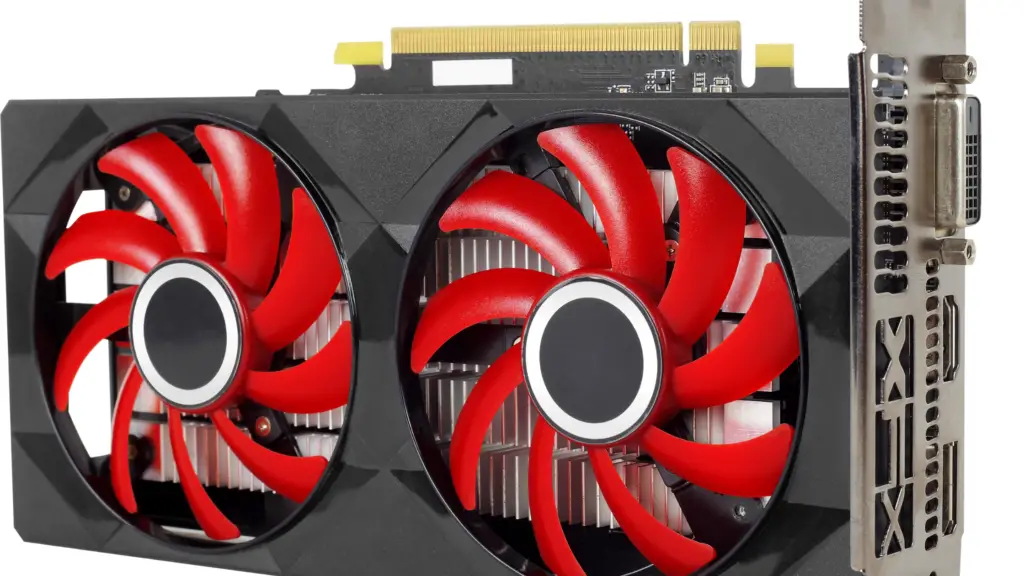
Step 5: Remove and clean your GPU
Most computers have a graphics processing unit, usually referred to as a GPU or graphics card. GPUs have their own fans and do need to be cleaned just the same as the CPU cooler and case fans.
Not all computers have a GPU, however, such as some low-end desktops that use the integrated graphics built into Intel or some AMD Ryzen CPUs. If you do not have a GPU, you can skip this part.
Removing the GPU
As the GPU is usually the easiest main component to remove, we’ll start with that. First, make sure your video cables are disconnected from the back ports of the GPU. Then disconnect the power connectors if your GPU has them.
There is usually a screw or two holding the GPU in place where the rear end meets the case with the display connectors. Remove these screws to let you continue removal.
Removing the GPU from the expansion slot is a bit more than just pulling it free. Modern motherboards have a plastic clip on the end of the expansion slot that keeps the GPU in place. You’ll need to push this aside while pulling the card out of the expansion slot.
You’ll want to be careful here and make sure that the lock is definitely out of the way, as if you pull hard enough on a locked GPU you could rip the plastic slot housing out of the motherboard. This would effectively make your motherboard useless, so, it’s definitely something to avoid.
Cleaning the GPU
If you don’t have compressed air a GPU is a bit tricky to clean. The construction usually consists of two or three large fans on top of a nearly full-length heat sink with somewhat dense fin stacks, so air is really the best way to clean it.
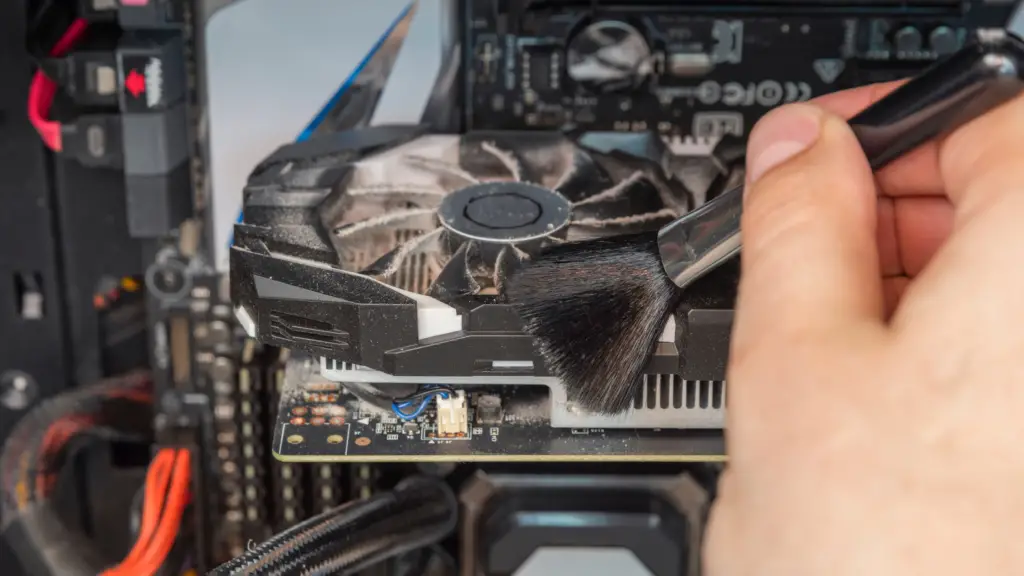
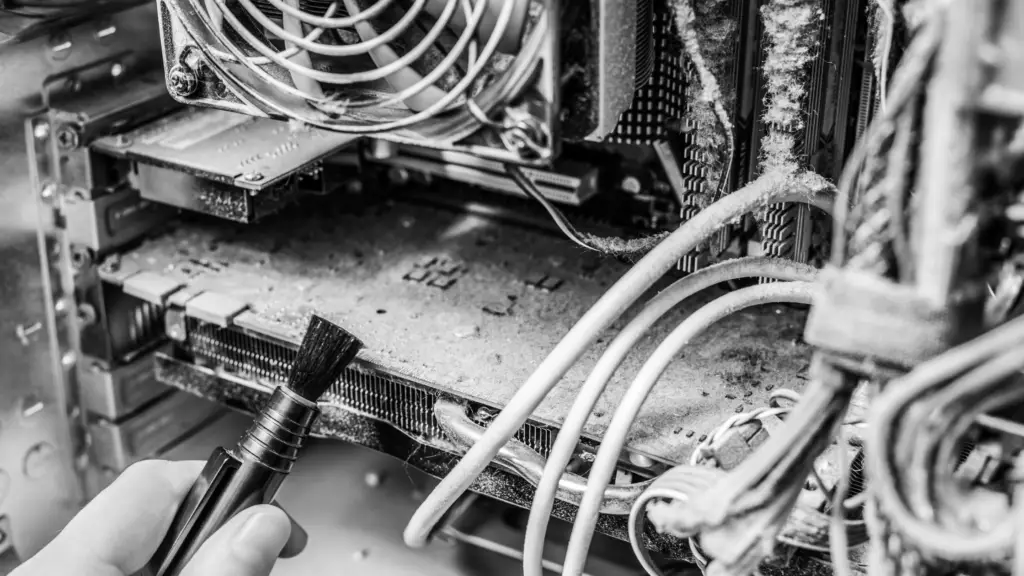
You can wipe down the fans with a paper towel or a brush. Using a brush with somewhat longer bristles will let you get into the heat sink at least a little bit more and will help loosen some dust. You can also just blow into the assembly as much as possible.
Step 6: Clean your CPU cooler
The CPU cooler is one of the most important parts of computer cooling and therefore is very important to clean out periodically. There are two main types of CPU cooling that we need to address.
Air cooling
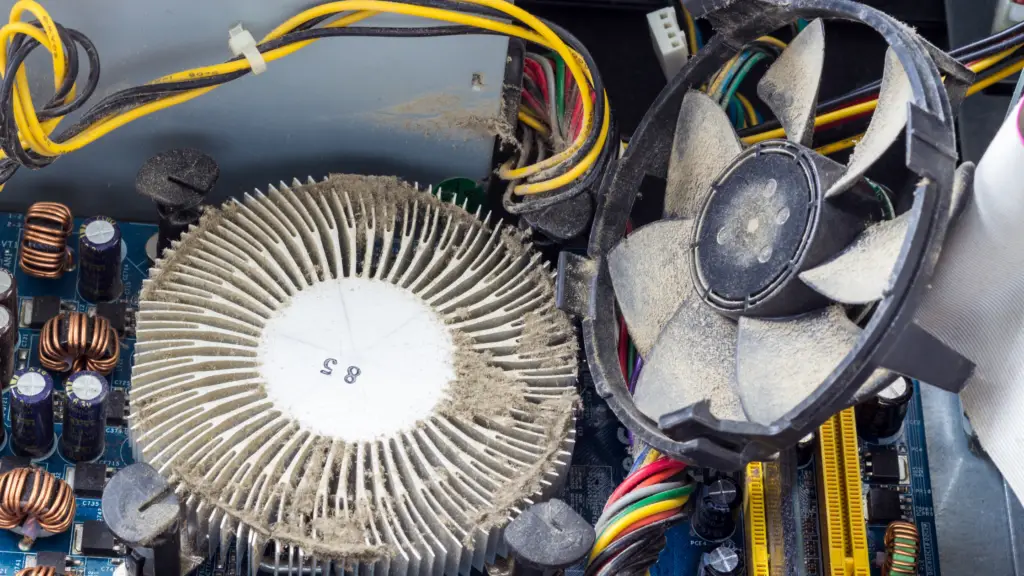
The majority of CPU coolers are what are called air coolers, named such because they rely on air moving directly over the cooler itself in order to dissipate heat from the CPU.
The cooler is comprised of a contact block that touches the CPU to pull heat out and away from the processor–there is also a grease-like thermal compound sandwiched between the CPU and block to facilitate a more efficient transfer of heat. But the heat needs to move further away than the immediate block otherwise not much cooling occurs.
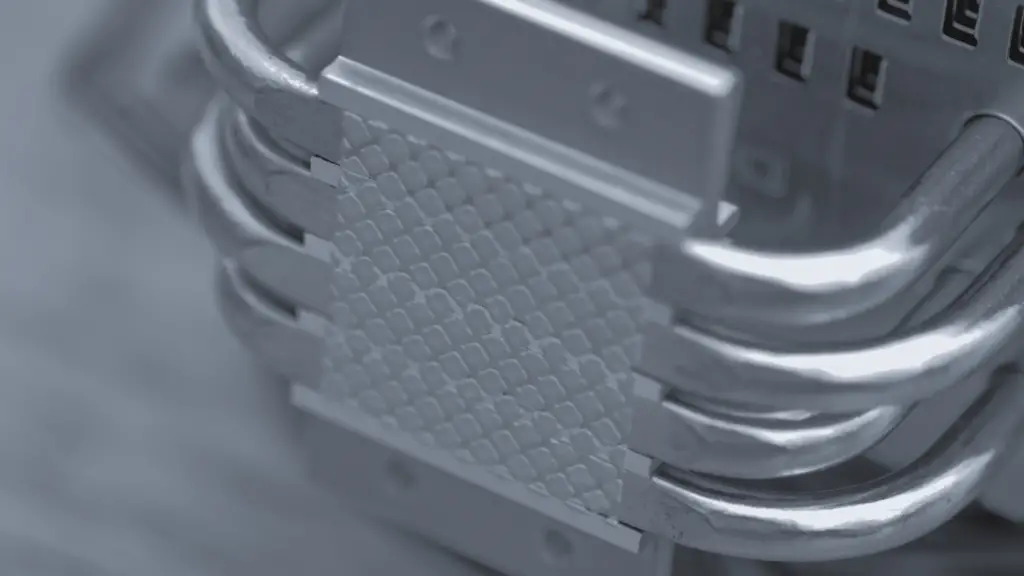
This is done via a set of heat pipes that are set into that block, which then runs up into a large array of metal sheets called the fin stack. The heat travels from the CPU through the thermal compound into the block, up the heat pipes, and into the fins where the air can then carry the heat away.
There is usually a fan (or two) on the cooler to help with this process. The fans are usually arranged to blow air across the fin stack toward the back of the case, aided by any front intake fans.
Cleaning dust from a CPU air cooler
Cleaning your CPU cooler is absolutely critical. Dirty CPU coolers can contribute to high CPU temperatures. This is also another step that’s much easier with an electric duster or compressed air canister, but still possible without compressed air pressure.
Remove the fan
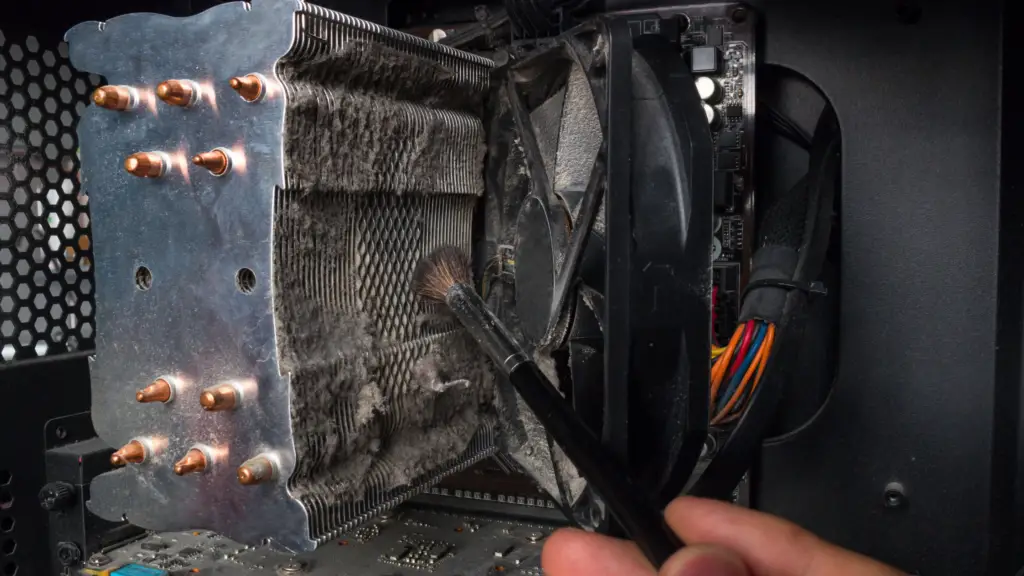
First, you’ll want to remove the fan from the cooler. Remove the metal clips holding the fan to the fin stack to clean the fan. Make a note of which direction the fan is pointing. There are usually arrows on the fan housing, as well as usually a sticker or logo on one side of the fan hub.
This is important because the fan needs to blow a certain way, so you’ll want to put it back on later in the correct orientation.
Clean the fan
You can clean your CPU fan the same as any other radiator or case fan. If you have an electric duster start with that and use a paper towel to get what’s left. Without a duster, a paper towel itself works fine, just slower.
Be sure to clean the inside rim of the fan housing, the fan blades front and back, and in general as much as possible.
Clean the heat sink
Cleaning the heat sink itself isn’t usually too difficult. The density of the fin stacks makes it difficult to get between them, but in most instances, you can just blow into the stack and most of the dust will come out easily.
It may be a bit difficult to do this without removing the heat sink entirely from its mount, but we would advise you to not remove the heat sink unless you plan on fully re-applying the thermal paste to the CPU.
Please note: You cannot just put the heat sink back on with the old thermal paste without seriously affecting the thermal performance of the computer. Again, if you don’t plan on cleaning and reapplying the thermal paste, don’t take the cooler off. This is a topic that would deserve its own article so we’re not going into it here.
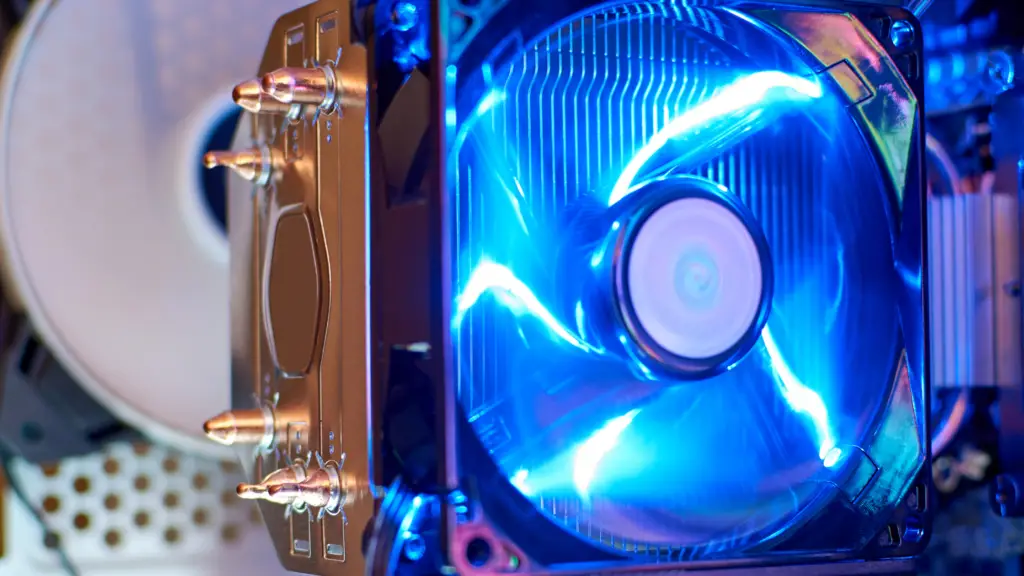
Water cooling
Some enthusiasts need more cooling capabilities and therefore opt for a more powerful type of cooling (for some computers)–water cooling.
For those who may not be familiar with this term, water-cooling is an alternative method to cooling your CPU (and sometimes GPU) instead of using a traditional CPU heat sink and fan (referred to as air cooling).
Most water-cooling setups are what are called “closed-loop cooling” systems (CLCs) or all-in-one (AIO) coolers. These consist of a water block that mounts over the CPU instead of the normal CPU heatsink and fin stack used in air cooling.
Tubes run from the block directly to a radiator and then back, making that closed loop. In order to circulate the coolant through the loop, there is a pump built into the block in most designs. AIOs are the most common water-cooling methods for off-the-shelf gaming computer systems as well as most custom-built or home-built systems.
For water-cooling enthusiasts, however, their system may be cooled by a custom-built water-cooling loop, consisting of not only the water block and radiators in a CLC, but a separate reservoir to hold the cooling fluid and a pump outside of the water block. These could be connected together with either soft tubing or rigid hard tubing.
Hard tubing will be more difficult to remove radiators and fans, so if your system has hardline water-cooling, you should proceed with caution, or perhaps skip this process (or only remove the fans and not the radiators, if possible).
Cleaning dust from a water-cooling setup
When cleaning dust from a water-cooling system, you won’t usually need to worry about cleaning the water block on the CPU. If you’re planning on repasting it, feel free to do so, but if you’re not familiar with the process don’t remove the block.
While a water-cooling setup doesn’t have a traditional heat sink on the CPU, they have much larger heat sinks in the form of radiators–basically larger and more dense versions of fin stacks that allow water to flow through them.
Remove the radiators and fans
Dust can get into not just the fans but also the radiators as well and in order to clean them both well, you should remove both from your computer case.
As we mentioned with the air cooler fan, radiator fans need to be facing a certain way to work best in your setup. Before removing the fans, make sure to pay attention to which way the fans are facing–which way the indicator arrows on the housing point, or which side of the fan has the sticker/logo.
Typically these are mounted with sets of screws that go through the fan housings leaving just enough to thread into the radiator without puncturing through the screw holes and into the radiator fins. Many radiators won’t stop a screw from threading in too far and this puncture is absolutely possible, causing a leak in your radiator.
Holding the radiator in place, remove the screws holding the whole assembly to the chassis panel. This will result in the fans and the radiator separating and you can now clean dust from both.
Note that you may need to disconnect the fans from their power connections if you don’t have enough slack in the connectors to do this, so make a note of where they’re plugged in. If you have enough length in the cables you don’t necessarily need to disconnect them.
Clean the fans
Using your brush or paper towel, wipe off the fan blades and fan housings. Be sure to get the inside and outside of the fan housing, the front and back of the fan blades, and the hub.
You may want to wipe down the fan power cables at this point as well.
Clean the radiators
Cleaning the radiator is a bit more difficult. Because of the fin density of radiators, you can’t necessarily shove a paper towel or cotton swab between the fins. Some form of air pressure is really the best way to clean both the fans and radiators.
But you can at least wipe down the outside of the radiators and then perhaps use good ol’ lung power to blow out what you can–don’t overdo it and get dizzy though!
While you shouldn’t use a vacuum cleaner on the inside of your PC case, you could absolutely one on fans and radiators once they’re outside of the computer and far enough away to mitigate static electricity issues.
Once you’ve cleaned the radiators and fans (don’t put them back in yet!) then you’re ready to move on to the next step.
Step 7: Clean the rest of the fans mounted in your case
Even if your PC is water-cooled, you probably have other fans in your case that aren’t attached to radiators. You should definitely clean these.
Similar to the fans for radiators, you may need to remove these from the case if they’re difficult to get to (or are behind mesh grills). Remove the mounting screws and wipe the fans off with your paper towels and use cotton swabs to get into the smaller areas if necessary.
Also, same as with the cooler fans, these are directional and you’ll want to make certain you know which way they need to be reinstalled later. Pay attention to the directional arrows on the fan housing and/or sticker side of the fan itself.
Once the fans are clean, leave them detached from your case to make the rest of the process easier.
Step 8: Clean your motherboard
Unless you cannot see the actual motherboard through a thick layer of dust, your motherboard won’t usually be damaged or cause performance issues with just a bit of dust. But it’s still a good idea to clean.
With a paintbrush, electronics brush, or some other type of brush you can go over the whole motherboard surface and its components to remove any dust on the motherboard. You’ll want to be sure to not apply too much pressure to components on the board, but if the brushes aren’t extremely rigid you should be fine.
Step 9: Wipe down any SSDs or hard drives
This isn’t super critical, but it’s a good idea to do this–especially if it doesn’t look great compared to the rest of the case.
In the days of having multiple large hard drives mounted in your case, this was a bit more difficult. But with SSDs, these are either M.2 drives on your motherboard or 2.5″ SATA SSDs mounted somewhere flat like on the back of the motherboard tray, the inside panels of the case, or the PSU basement shroud (or bottom of the case if there is no basement shroud).
While having a bit of dust isn’t the worst thing in the world for drives, giving them a quick wipe will help ensure they don’t eventually build up to a heat insulator. Don’t worry about removing them from their mounts as the underside of the drive is probably fine.
If you do have a couple of traditional 3.5″ spinning HDDs in your case, however, it may be a good idea to wipe down the top/bottom of the drive. You may need to slide them out of their mounting spots, but you can put them right back in after you do this.
Step 10: Wipe down cables
Depending on what you have in your PC, you will have a variety of cables for power or data to different components. These can collect dust just the same as anything else, and should be cleaned periodically with the rest of the case.
It’s fairly easy–wrap your paper towel around a cable and then just drag it along the length of the cable. Don’t worry about undoing your cable management and just get what you can unless it’s really bad.
Step 11: Clean the power supply
The power supply in your computer isn’t a fully sealed box–it has ventilation and a large fan to keep all of those power bits cool. Cleaning it without compressed air and/or removing it from the case is a bit tricky, however.
Remove the power supply
Start with removing the four screws at the back of the power supply on the outside of the case. Depending on how your case is designed, you could slide it out the rear side panel or pull it forward through the main panel if your case doesn’t have a “basement”–the separator that keeps your power supply hidden from view from the main side panel.
If your power supply is modular (meaning the cables can be unplugged at the supply itself), you can unplug those cables to free the power supply. Be sure to make a note of what is plugged where, but usually, the plugs are labeled to match the labels on the power supply unit.
Clean the power supply
The power supply is another difficult component to clean without compressed air, but you can still often do enough by wiping it down and blowing it out with your lung power.
You’ll want to blow out the large main fan as well as the exhaust on the backside. Anywhere you see grills or vents just give it some air to do the best you can.
Wipe down cables
You may not have been able to reach all of the cables during the previous cable-cleaning section, but now is a good time to get the other end behind the rear side panel.
Step 12: Clean the rest of the case
In Step 4 we suggested using the electric duster to blast out the majority of the case. But if you don’t have that, you’ll likely still have a fairly dusty PC case after what we’ve done so far.
With the components removed from the case, however, we can clean the case as much as possible. It may take a bit of time and patience, but you can wipe out the dust left in the case with a paper towel and/or a paintbrush. Don’t forget the back of the rear side panel as well.
Be sure to pay attention to parts of the case that are visible through any tempered glass panels and make sure it looks great.
Step 13: Reinstall the power supply
At this point, we should have cleaned all the main components and case areas and we can start to reassemble the computer.
Start with reattaching the power supply (if you removed it in the steps above) and put the screws back in to hold the power supply in place.
Make sure any modular cables are fully plugged in and the cable management is as good as you can get it.
Step 14: Reinstall the case fans
If you removed any case fans (not the radiator fans) let’s get those in now. Hopefully, you kept track of how the fans were installed before removing them and can put them back in the correct fashion.
The indicator arrows and/or fan sticker/logo can be used to identify which way the fan needs to face.
Route the fan power cables as neatly as you can, trying to put them back the way they were before removing them.
Step 15: Reinstall your air cooling fan or radiators and fans
Now we can reinstall your CPU cooler fans, and we’re almost done. For air coolers, clip the fan back onto the fin stack in the proper orientation and reconnect the power if you removed this.
If you have a water-cooling setup, reinstall the fans and radiators while being sure to install them in the same way they were before being removed.
Be sure to use the correct screws in the correct way–it’s possible to damage a radiator by screwing a longer screw into it if not stopped. You’ll want to be careful here.
Step 16: Reinstall your GPU
Reinstalling the GPU is easy enough. Line up the “golden fingers” on the bottom of the card with the plastic expansion slot on the motherboard, and then gently but firmly push the card into place.
You should feel it seat into place, and just give it a bit more of a push to ensure it’s in all the way. Reinsert the screws holding the rear bracket in place, reconnect the power connectors, and reconnect your video cables.
Step 17: Reinstall the case air filters
Reinsert the case dust filters back to where they belong. Pretty easy step!
Step 18: Reinstall case panels
If you removed the case panels, let’s get those back on now. But don’t put on the main side panel yet–it’s bad luck to fully close up a computer until you’ve confirmed it boots up!
Step 19: Reconnect all cables and power on the computer
You should now be able to boot up your PC. Reconnect all of the cables to the machine and fire it up. If it doesn’t boot up, recheck your steps and see if you missed something like reconnecting the secondary power cable or something easy like that. If it works, there’s only one step left..
Step 20: Reinstall the main side panel
Now that the system boots properly, we can now close up the case with the last side panel. Fasten this back on and now you’re all set with a nice and clean computer.
Why should you clean dust from your PC?

The main reason to make sure your PC is dust-free is to ensure that it can operate as efficiently as possible and not lose performance due to thermal throttling.
Dust can build up within a computer and restrict airflow as well as allow heat to build up as the dust accumulates on components.
Piled-up dust will keep heat in and allow it to build, and without airflow, there’s no cold air moving across the warm components to dissipate that heat away.
Heat is the enemy of efficiency, and therefore performance. If a CPU gets too hot, the system will deliver less power to the chip in an effort to reduce the heat. This is called thermal throttling–the voltage and clock speeds are throttled due to the thermal limits of the CPU.
Ensuring your PC is dust-free will mean that your computer is able to get as much cooling as possible to keep performance safe and fast.
Can you use a vacuum cleaner to clean dust from your PC?
In most instances, a vacuum cleaner is not safe for use with computers. The reason why is fairly simple, but it’s important to keep this in mind.
Computers are can be very sensitive devices, and computer components can be damaged by electrostatic discharge (ESD). While computers are a bit more durable than most people think (something confirmed by Linus Tech Tips in a rather interesting video about ESD and computer components), there still is a point where a large enough ESD can damage computer components.
Vacuum cleaners can generate large static shocks and therefore should not be used near computers. Static can be communicated to a computer even if you’re using a hose attachment and the vacuum itself isn’t near the computer.
What about mini vacuum cleaners? Most of these are either not powerful enough to really be useful, or may generate an ESD if they are. We’d advise against them for most computer-related things–but they’re fantastic for keyboards!
Instead of a vacuum cleaner, we’d advise using an electric duster like the MetroVac duster we mentioned at the top of the article. It’s extremely powerful, safe to use with electronic components, and comes with a variety of attachment nozzles to fit any need you may have.
Just like a vacuum cleaner, of course, it will terrify your cats so be warned. We found out the hard way!